Scenario
Would like WiFi across the office with multiple access points.
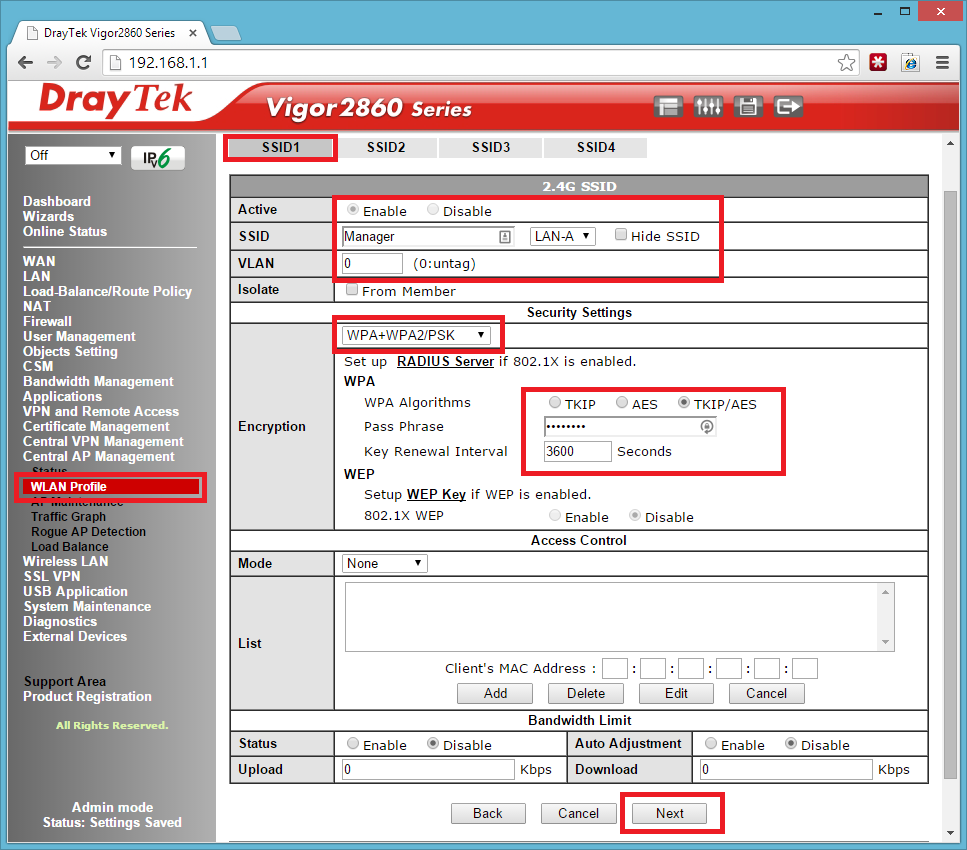
Would like a Manager SSID with full access
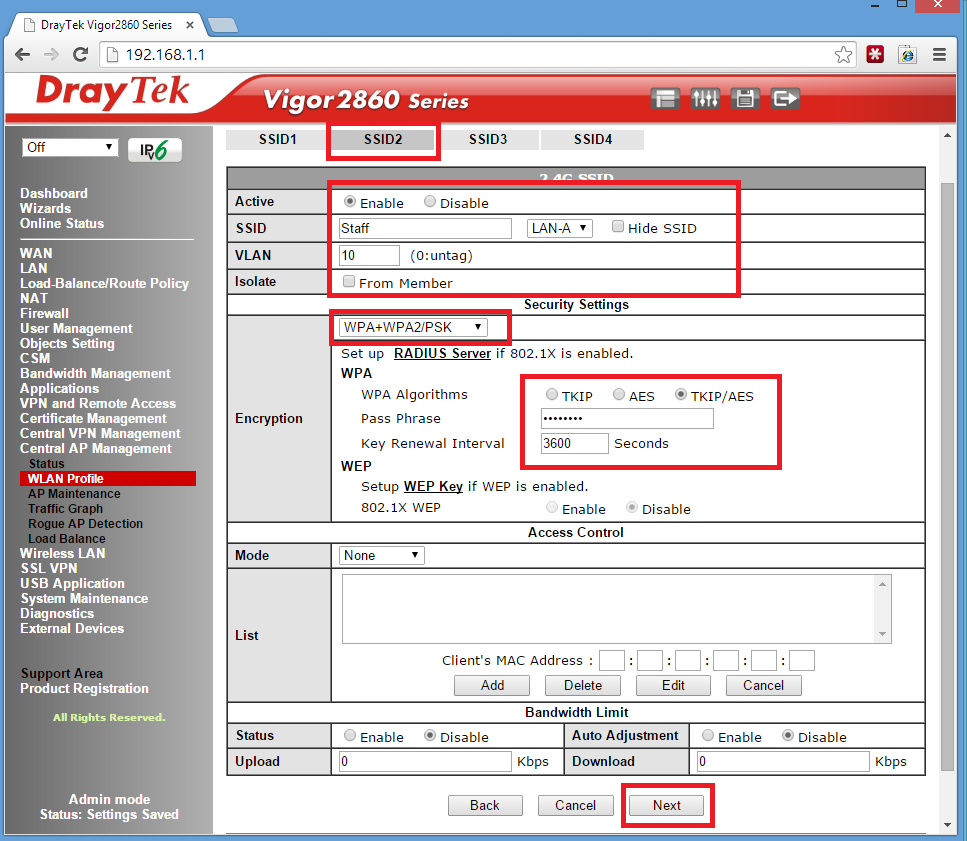
Would like a Staff SSID with Internet Access for one hour between 12-pm.
1.
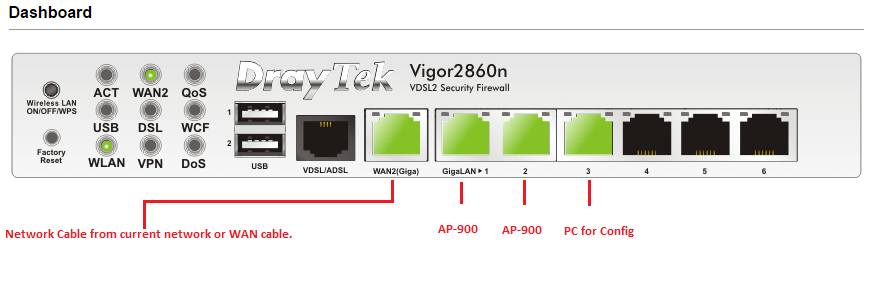
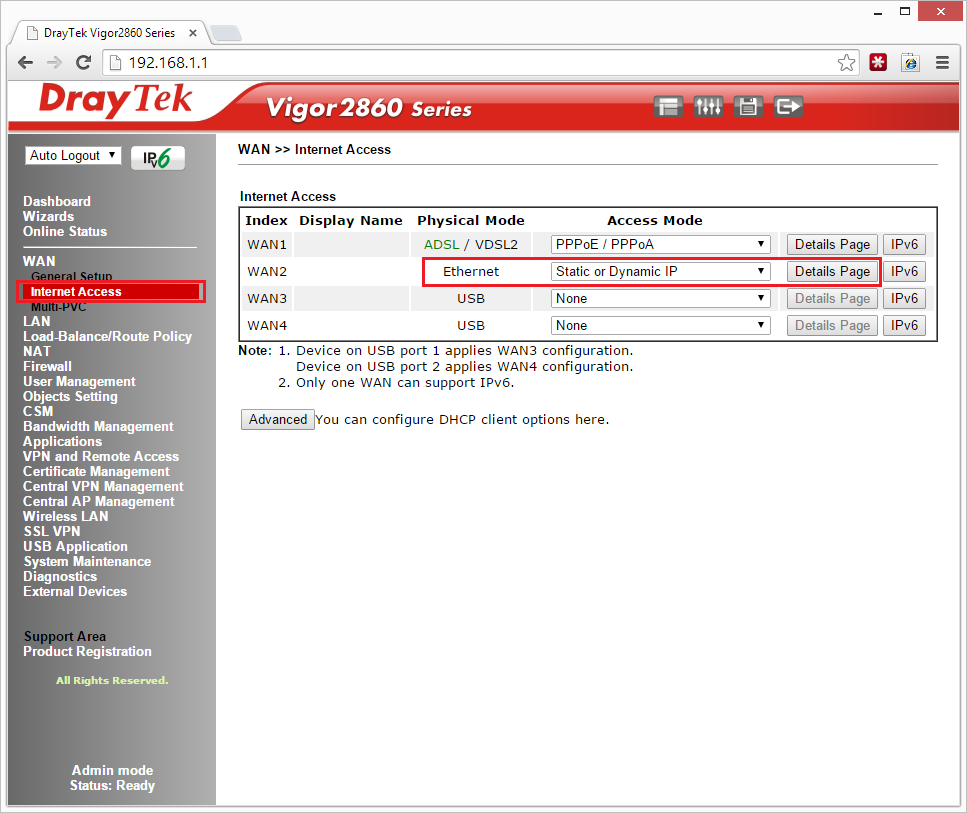
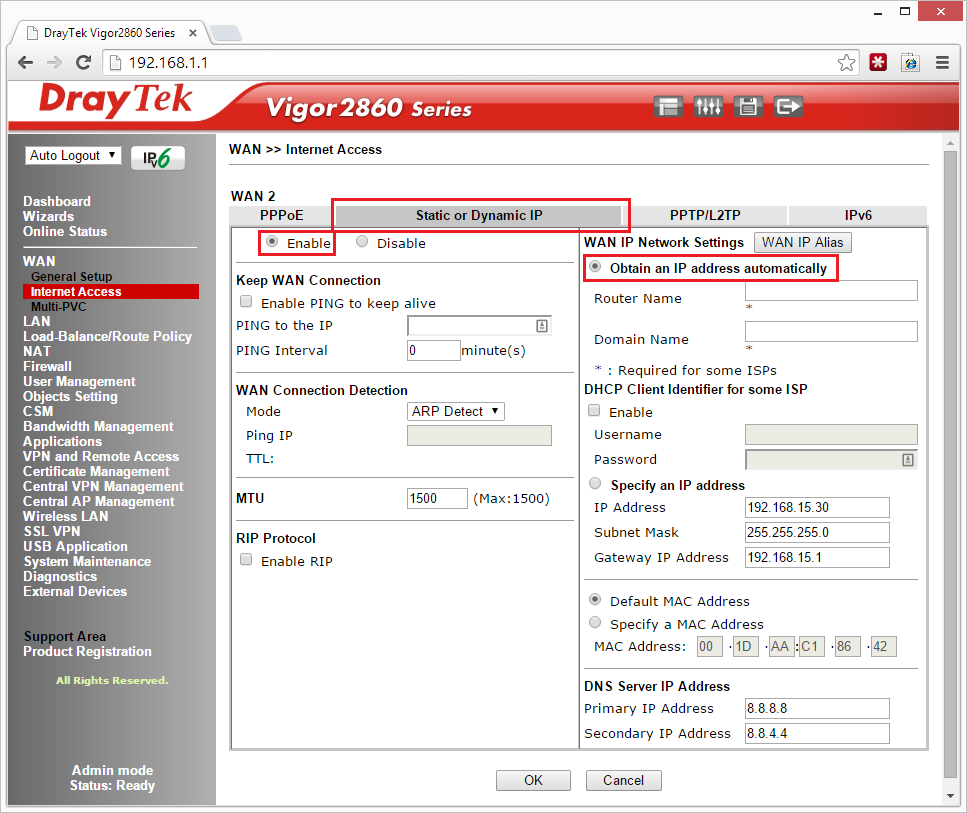
Setup Draytek 2860n with internet access – in my test environment I used a cable from my current network to act as the internet to create a small internal test network if you want to do this see below.
2.
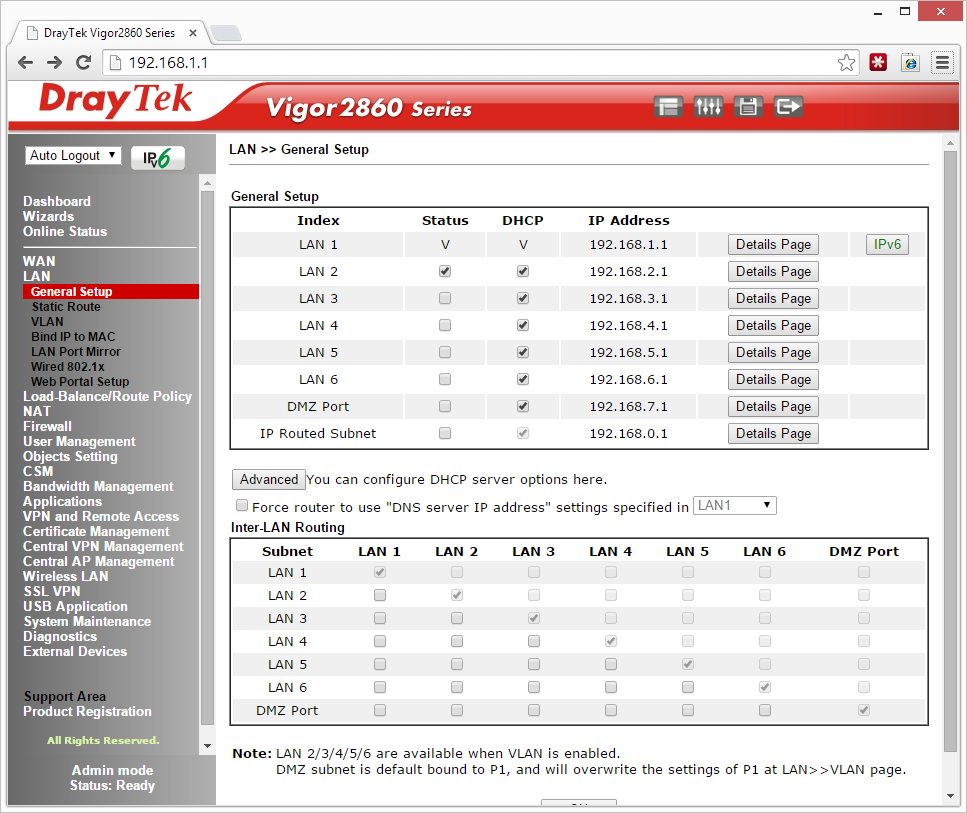
Now that you have internet access we need to create some VLANS and setup your IP range. I made the MANAGER network 192.168.1.1 with VLAN 0 and the Staff network 192.168.2.1 with VLAN 1.

3.
Next is to setup the Access Points, Plug them in to Ports 1 and 2 like the diagram above, power them on and make sure the network cable is plugged into any of the LAN to setup the SSIDs. They should show up in the Central AP Management Status Screen. Click onto WLAN Profile once green and edit the default profile.
4.
Click Finish then Apply to the device – See below!

5.
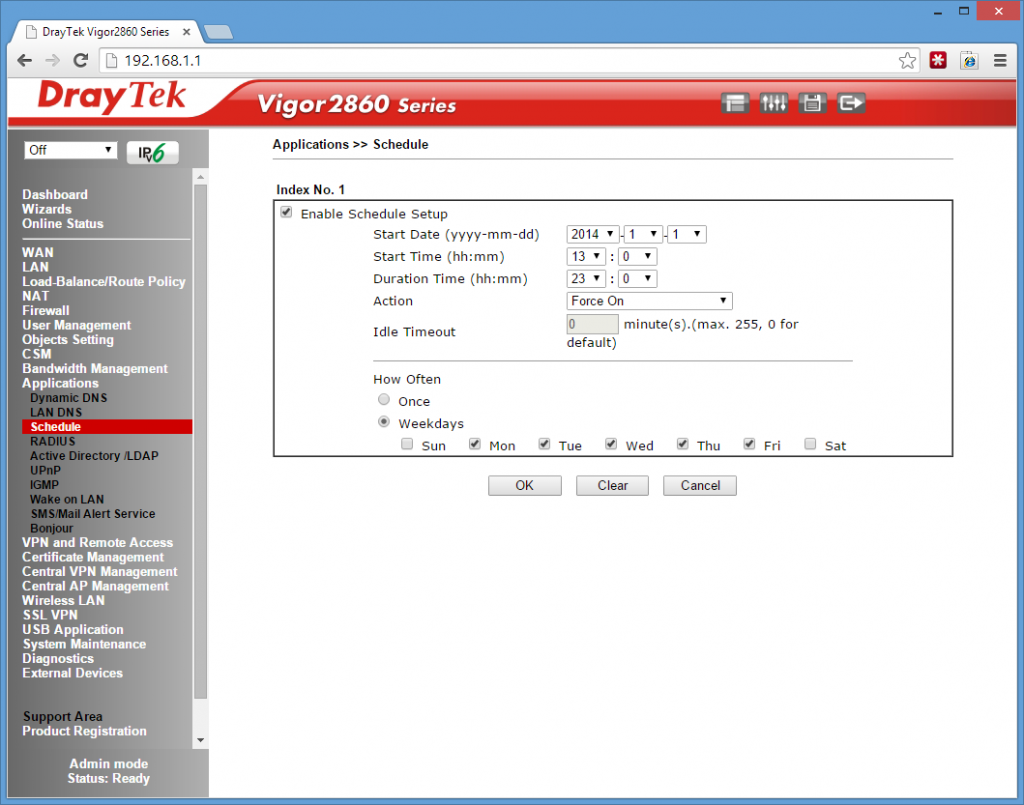
Next is to the setup the schedule. Please Choose Index No.1 I’ve chosen to Force On the Block at 1pm for 23 Hours. Monday to Friday and Unlimited on Weekends.
6.
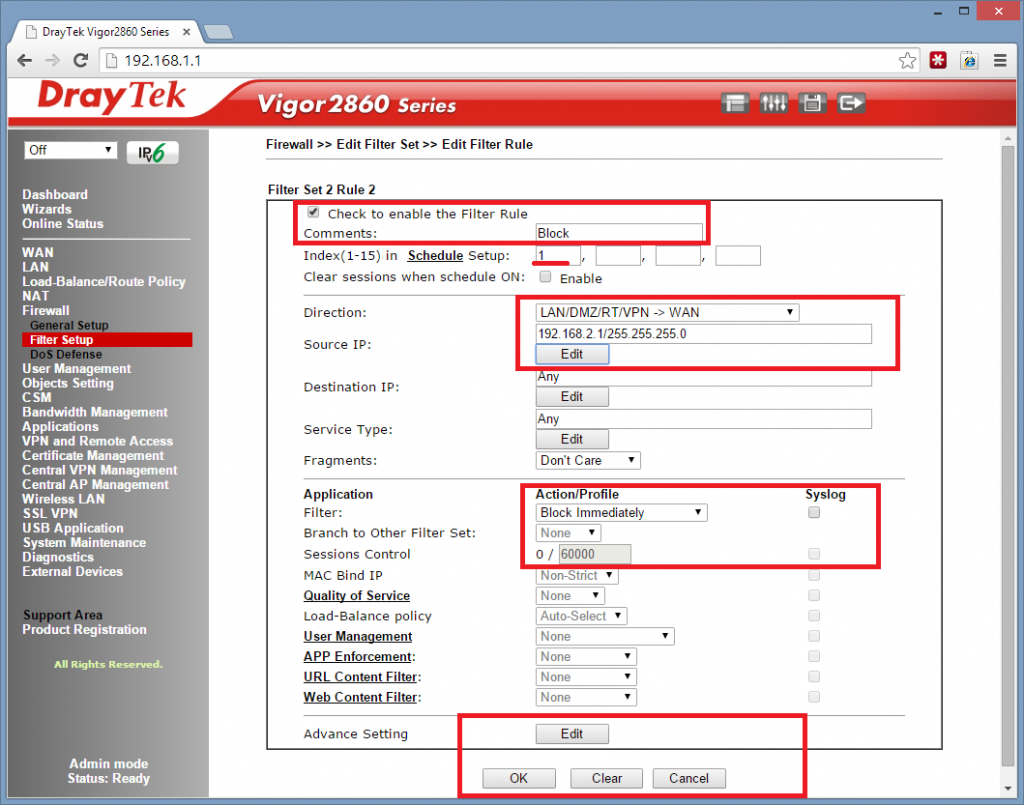
Finally we need to setup the firewall to work with the schedule to block the internet on VLAN1 (staff.)
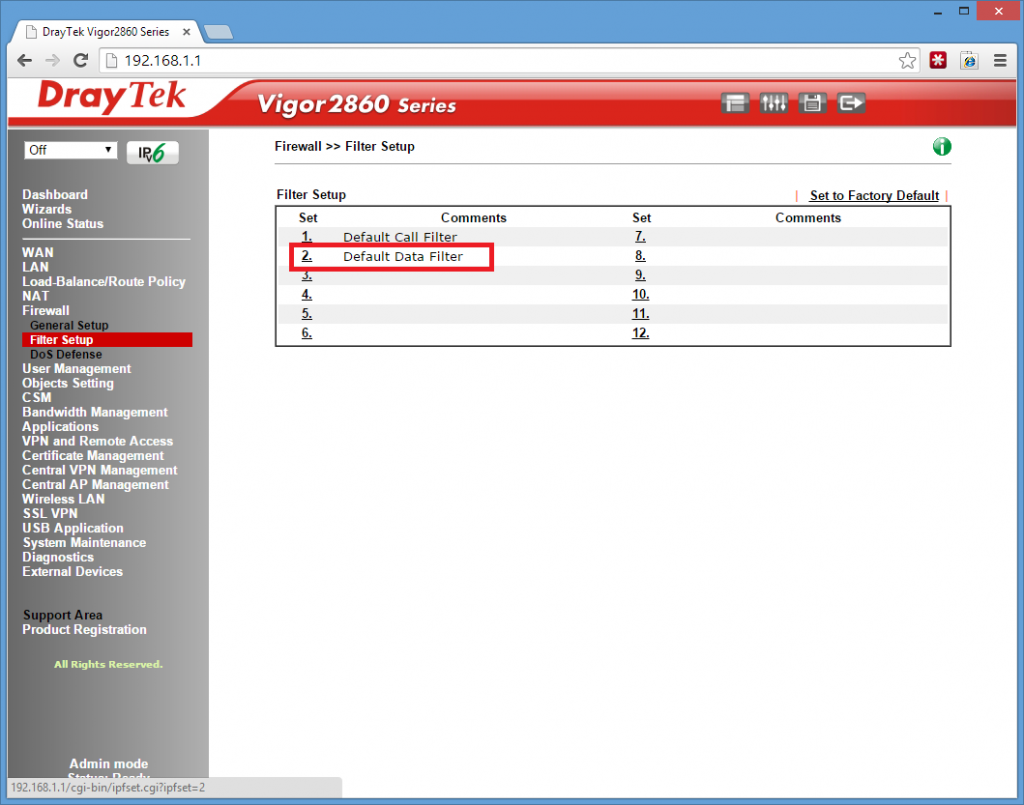
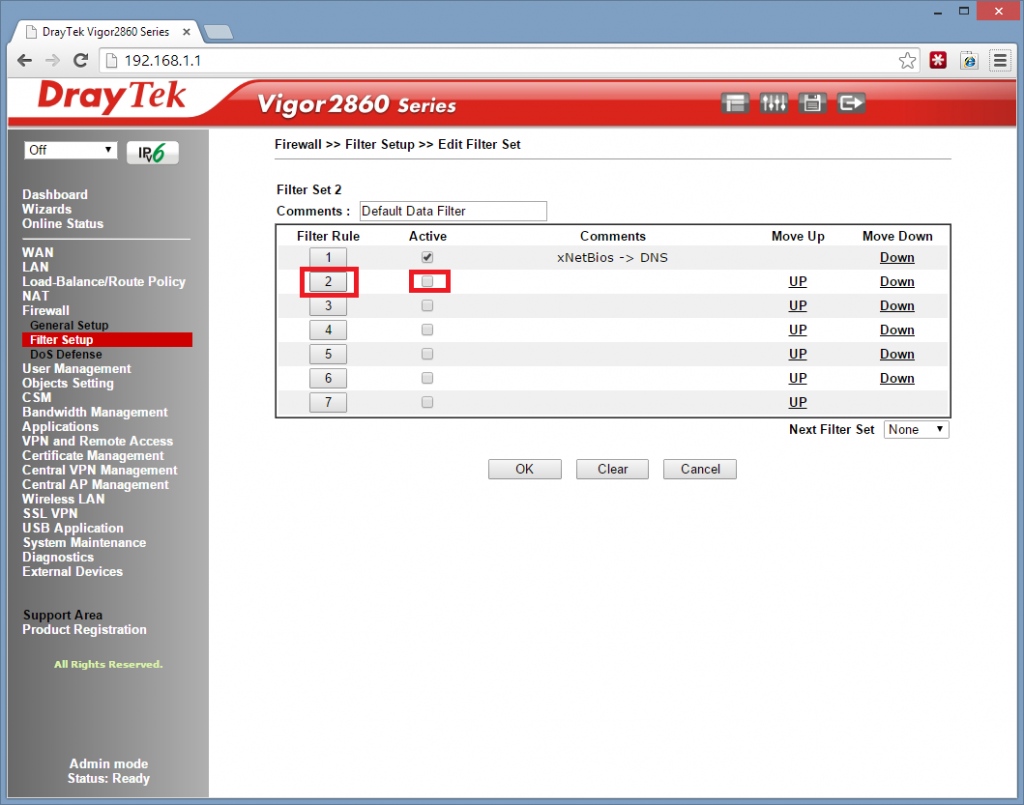
Remember VLAN1 is set on the 2.1 Range and we are going to block all LAN > WAN traffic here on the 2.1 range, if you have chosen a different range at the Start you need to make sure you choose this range here.
See Below!
Sign into Office 365
Sign into your office 365 account or Exchange online account, or use this handy link! https://portal.microsoftonline.com
Once logged in Hit outlook at the top right hand side.

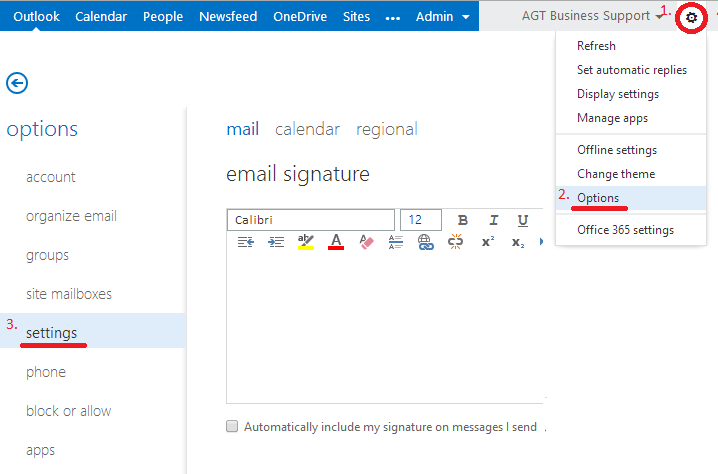
Settings in Outlook
Next click the small cog on the right hand side and choose options, then settings on the left hand side this will take you to the signature side.
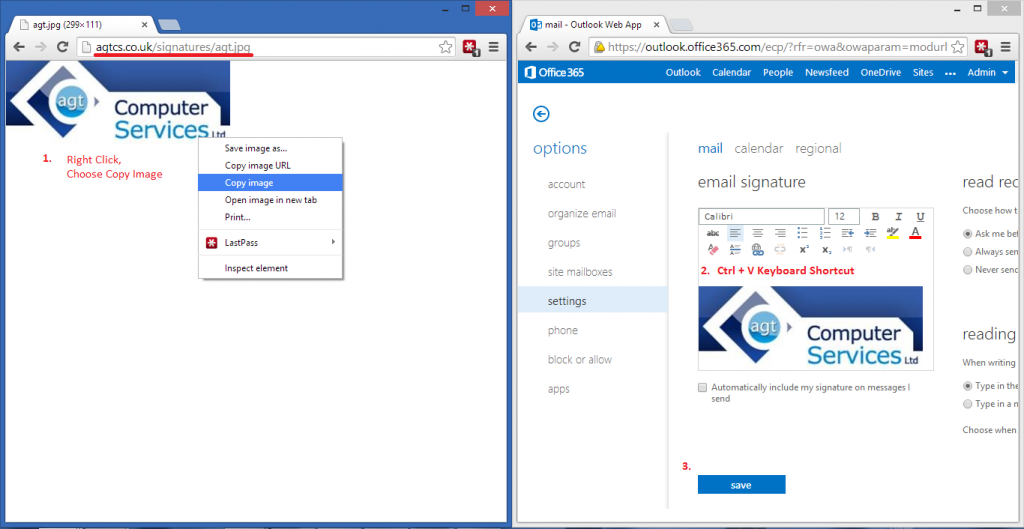
Hosting your signature
This is where you create your signature, if your need to add a picture to your signature like the millions of people out there that do, unfortunaly microsoft dont allow you to upload it just yet. What you can do is host the image elsewhere and copy the html link in.
For example i have hosted a .webp signature at www.agtcs.co.uk/signatures/agt.webp on my website, once you open this link click copy image and the only way to paste it into the signature box is using the keyboard shortcut for paste (Ctrl + V)
Please click the image below to see instructions.
Hope this helps!
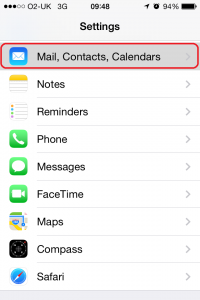
1. Go to Settings – then Mail,Contacts, Calendars.
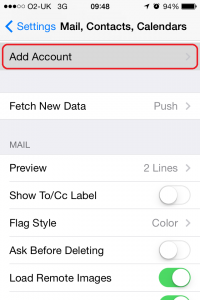
2. Add Account
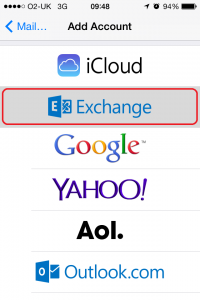
3. Select Exchange – Microsoft Exchange is a fully synchronised email contacts and calender system. It can be added to multiple devices and benefits from perfect synchronisation including your Microsoft Outlook software at work.
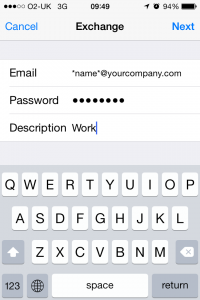
4. Next type in your email details provided by us or your IT Manager.
5. Finally – Please choose which items you would like to synchronise. If you have calendar appointments and contacts on your outlook email at work these will sync across also.

It has to be Pro to Downgrade Windows 8!
In Microsoft’s License terms they will allow you to Downgrade Windows 8 to Windows 7 but unfortunately it has to be the Professional version. So you will need;
Find your Product Key
The most important thing to do is to find your product key, with windows 7 this used to be a sticky lable on the bottom of your laptop/computer, now they it’s imbeded into your laptop which you can’t physically see. This is great when installing windows 8 because it automatically finds the key and activates! but when downgrading to windows 7 this can be a pain. To find your windows 8 key you have a couple of free options see here;
Make sure you keep your product key in a safe place, if everything goes wrong and you want to revert back to windows 8 you will need this key.
Do your Driver Homework
This next step is equally important, you will need to find out if you hardware supports windows 7. For this you will need to visit the manufactors website and check out the drivers – for todays example i am using a Lenovo Ideapad U310 UltraBook.
As you can see from the screenshot below the laptop was purchased for windows 8 pro but DOES support windows 7. I have downgraded a few windows 8 pro laptops recently and the wireless driver was the one i had the most problems with so just triple check it clearly has one like below.

Backup!
Please backup all your music, documents, pictures, movies, favourites, and any program license keys! the next step is where we wipe everything!
Change UEFI Settings and Enable Legacy Boot
Next, we need to change the bios settings, please follow my instructions as booting straight into the bios by pressing the del key, will for some unknown reason make windows 7 crash during installation. So first hover to the bottom right corner and open up the charms bar and click on the gear icon.

Click Change PC Settings at the very bottom, then into general on the left hand side, scroll to the bottom on the right hand side and click Restart now underneath Advance Start Up.

This will open up a blue screen, select troubleshoot, advanced options, then select UEFI Firmware settings, then restart.

This will open up your bios screen, in the advanced settings part of this screen you may have a few different options and is really down to how the bios is written, take a look at these examples that it could be;
- Enable Legacy boot from UEFI boot
- Disable UEFI boot.
- Disable Secure Boot
In my case i had to change the boot mode, see below.

Installation and Activation
While you’re in the bios change the boot order either USB, CD/DVD, or Network and save settings then reboot. After you have installed windows 7 with ALL!!! Drivers, it is the time to activate. For this you will need to click on windows activation, click on the telephone activation and you will need to speak with an advisor. Tell them you have windows 8 pro and you are downgrading to windows 7 pro, give them your key over the phone and they will convert it into the numeric id that you will need to enter into the activation box and this will give you the fully genuine actvated version of windows 7 and we are done!
PLEASE NOTE every time i have phoned windows for telephone activation a couple of the call centre people did not know what i was on about and they said i can’t do it, i had to put the phone down and re-dial until somebody knew what to do.
Fujitsu Siemens Amilo Pro Wireless Not Working
At our Lytham computer shop, we had a laptop (Fujitsu Siemens Amilo Pro) in with a bothersome little bug. It’s a common bug in vista for this particular model.
Launch Manager
First of all the wireless would not work at all, it would not find any wireless networks but would look as if the driver was installed. This was due to a little piece of software called the ‘launch manager’ not being installed. So the FN + F1 button would not work.
You can find the Launch Manager here.
This is what it looks like.
Wireless Status Option.
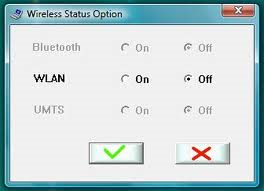
Create a .VBS script
Once that was working, we were hit in the face with another problem! You have to press FN + F1 every single time you start the laptop!? Just to bring up the Wireless Status Option.
Anyway to cut to the chase, this fixed it.
Open up Notepad, copy and paste this:
Set WshShell = WScript.CreateObject(“WScript.Shell”) Set oExec = WshShell.Exec(“C:\Program Files\Launch Manager\WisWBSet.exe”) do while WshShell.AppActivate(“Wireless Status Option”)=False WScript.Sleep 100 loop WScript.Sleep 100 WshShell.sendkeys(“{TAB}{TAB}{LEFT}~”)
2. Save this file as “<somename>.vbs” somewhere on your harddisk (pref Documents)
3. Copy a short cut and drag it into your “Start Menu / Programs / Startup” to ensure it starts automatically when rebooting.
We recently had a problem with a clients Mac Book / Outlook 2011 / Microsoft Exchange / Server 2008.
Since the internet cut of at their main office outlook 2011 and mac mail both were acting strangely. Outlook 2011 would say Downloading 1/7000 items, it would complete but the inbox would be completely blank and the process would start again. Mac Mail would download a few emails from a previous year but just randomly stop and no more emails would download.

After many many work hours. We finally Cracked it!
On the exchange server.
- Click Start, click All Programs, click Accessories, right click Command Prompt and click Run As Administrator.
- Change Directory to <root drive>\Windows\System32, the root drive is typically C:. Run the following command
lodctr /R
This will restore the base or core counters
- Check the registry value under HKLM/Software/Microsoft/WindowsNT/CurrentVersion/Perflib/009 and ensure that the value Counter is no longer corrupted.
- In the Command Prompt window, run the following command:
wmiadap /f
This will force the reload of all counters in to the WMI repository.
- Open Performance Monitor (perfmon.exe) and click the green + to Add, this will open Add Counters. Verify that the MSExchange counters exist and have Instances populated.
- Restart the Microsoft Exchange Server computer.
NOTE: We didn’t have to restart the Exchange Server.
NOTE: You may need to recreate the identity on the mac see here. http://support.microsoft.com/kb/2360509
NOTE: Original Fix Link. http://support.microsoft.com/kb/2264110
This job was a real head scratcher!

We popped in the details of the exchange account to a Windows 7 Pro machine and it was fine – this ruled out the server.
We re-created identities on the mac, we installed every email client under the sun for mac including entourage, mac mail, thunderbird all with different but similar problems – it had to be the mac!
We re-installed outlook 2011, we deleted every single text file, document and folder to do with Microsoft and Office on the mac!? In the end we created a virtual machine with Mac OSX on so we could break it as much as we wanted and revert the changes – just so we didn’t have to break the clients mac book completely. When we created the virtual machine with a fresh installation of Mac OSX, it had the same problem – it had to be the server!
This went on for nearly 2 weeks! Hours spent crawling forums and Googling. Every bit of spare time throughout the work day was back on this with trial and error.
I still cant believe that a performance monitor can stop email going to blackberry and mac devices!?
Anyway hope this blog saves you all the hours i spent on it.
All the Best.
Malware, OS upgrade or messing with drivers can sometimes have an adverse effect on your file extension association resulting in all programs having a .lnk extension.

once you are at this point, clicking shortcuts or programs from the start menu windows will proceed to ask “what program would you like to use to the .lnk file”.
Resolution
- Download the following .reg file (this will reset the .lnk settings to default)
- Double click the file, click yes and ok to the prompts from Reg Edit
- Reboot your machine.
You’re done!
it wouldn’t be surprising if this was a result of malware. we would suggest a thorough scan from a trusted antivirus or malware package.
if you are still concerned about security, fetch it into one of our computer, tablet and laptop repair shops located in Blackpool or Lytham.


